| GPS Coordinates (Trolltunga) | 60.1241° N, 6.7398° E |
| Elevation at the Tongue | Approximately 1,180m above sea level |
| Drop Below the Tongue | ~700m above Lake Ringedalsvatnet |
| Recommended Altitude Range | 50–300m AGL (above ground level) depending on shot; stay below 120m AGL per standard EASA rules unless certified |
| Best Time of Day to Fly | Midnight sun window (June–July): 10 PM–2 AM for warm side-lit glow; standard season: golden hour 1–2 hours after sunrise |
| Best Season | Late June through mid-August for guaranteed access and midnight sun; late August–September for autumn color |
| Drone Regulations Summary | Norway follows EASA open category rules; recreational flights under 250g (e.g., DJI Mini series) require no registration in Open Category A1; drones 250g–25kg require operator registration and follow A1/A2/A3 subcategory rules; no specific ban at Trolltunga as of 2024; fly responsibly around other hikers; Hardangervidda National Park boundaries are nearby — confirm your exact position is outside park limits before flying |
| Skill Level Required | Intermediate to Advanced — strong unpredictable gusts, high altitude, long hike to location, cold temperatures affecting batteries |
| Nearest Town | Odda, Hordaland (~27 km) |
What the Trolltunga Aerial View Reveals That Ground Level Hides
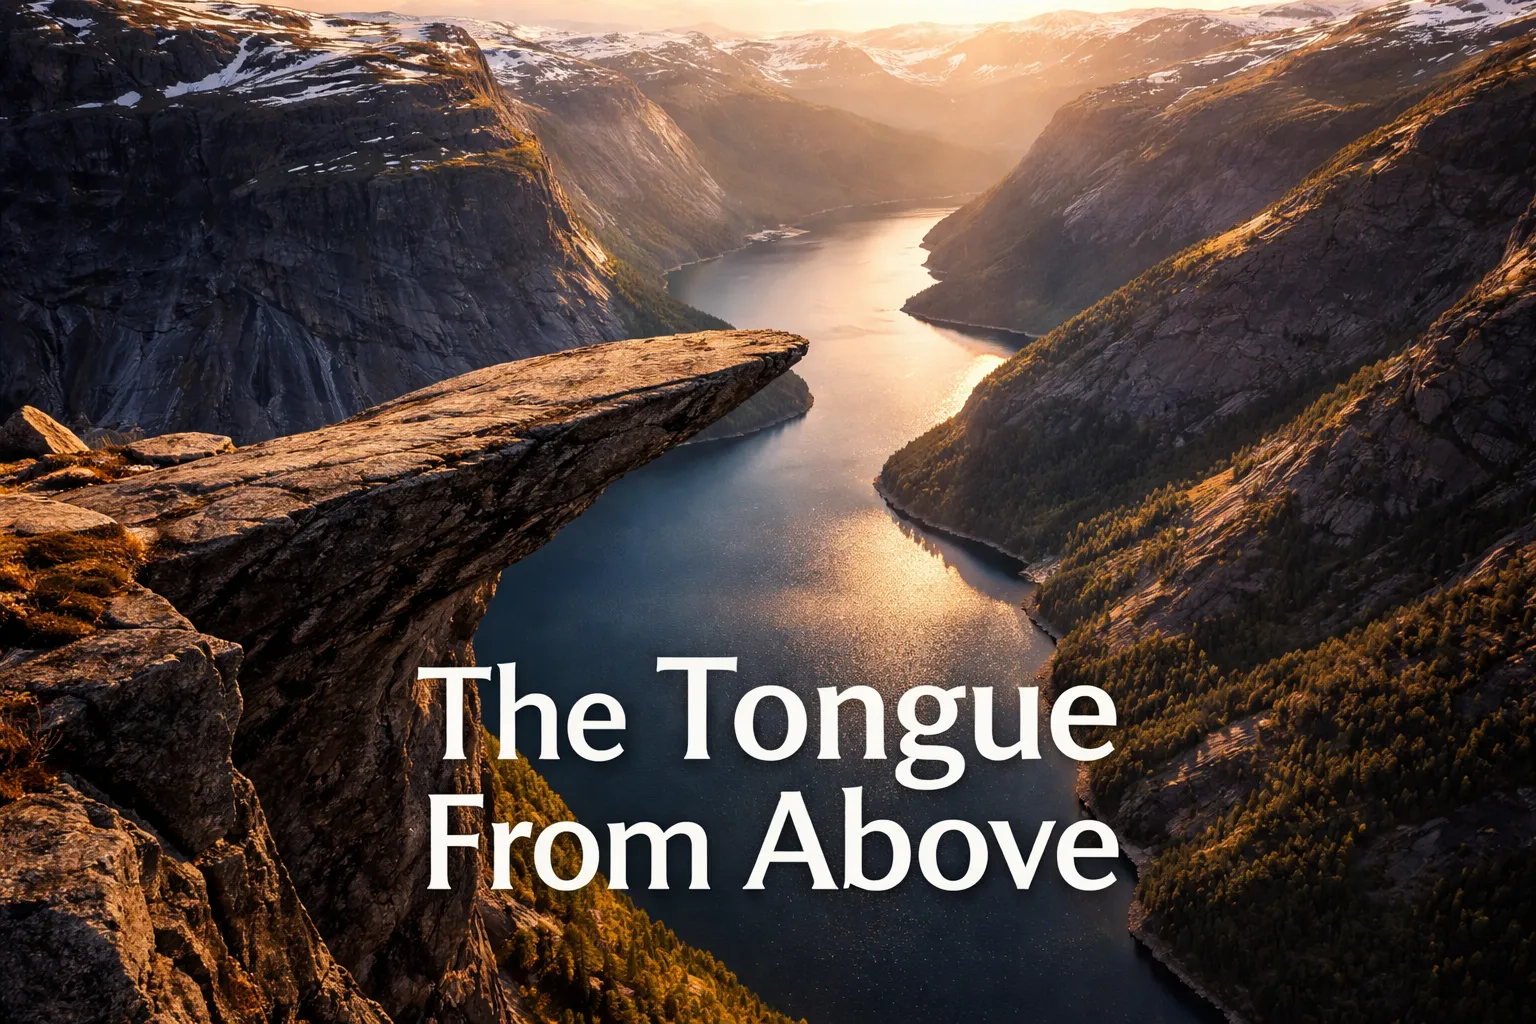
Most write-ups describe the Trolltunga ledge as “ten meters out, narrowing to a point,” toss in the number, and move on — as if you’d actually register that taper while you’re standing on it. You won’t. Your own balance is running the same trick your brain plays on anyone above a serious drop: it fixes on the density of the rock under your boots and quietly edits out the math of the fall. That’s why the 700-meter void beneath you never feels as real as it should. Send a drone up 80 meters and look back down, though, and the editing stops. The Trolltunga aerial view from above shows the tongue as what it genuinely is: a slab of rock so structurally unlikely it reads like a rendering glitch. The platform runs roughly 10 meters and tapers to something like 2 meters at the far tip — dimensions that vanish entirely when your feet are on them. From height, that thinness sits in full context: plateau pressing in on three sides, nothing but air on the fourth.
Get the drone up there and the size relationship between the tongue and Lake Ringedalsvatnet becomes obvious in a way that makes this one of the most striking norway fjord drone photography setups anywhere in Scandinavia. On foot, the lake reads as background scenery, something far off and flat. At 200 meters above the rock, though, it takes over the lower half of the frame — a long, cold sheet of electric blue-green pinched between ridgelines — while Trolltunga shrinks to a grey sliver jabbing accusingly into the empty space above it. The Hardanger plateau around it, still streaked with snow in July, runs on for kilometers in every direction. What the camera actually finds isn’t a cliff at all. It’s a thin whisker of stone laid across an ancient shelf of land, and it’s the mismatch — human-scaled rock against an inhuman-scaled backdrop — that makes the place feel so different once you’re above it.
What caught me off guard, flying it: the lake doesn’t hold one color — it shifts hard depending on hour and cloud. Straight-up noon sun turns Ringedalsvatnet an almost fake-looking turquoise, the kind of saturation that seems edited even when nobody’s touched it. Roll around to the midnight sun window, closer to 11 PM, and it cools into a deeper steel blue with copper glints skating across the surface, while the plateau above warms to an amber that makes the whole scene feel geologic, almost prehistoric. Fly it at different hours and you’re not getting variations on a shot — you’re getting different photographs of the same rock.
Trolltunga Drone Photography Norway: The Best Shots to Capture
Across two separate visits and multiple flights at this spot, here’s what I’ve settled on as the compositions worth the effort — along with the technical setup behind each one.
The Profile Shot (The Definitive Trolltunga Image)
Bring the drone up to roughly the tongue’s own elevation — around 1,180m above sea level — push it out over the drop, then swing the camera back toward the cliff face. Shot this way, horizontally, you get the full silhouette of the tongue: the 700-meter fall reads as actual empty air below the rock, lake surface barely visible way down at the bottom. Put a person on the tip and they show up as a tiny figure balanced on an impossibly narrow ledge with nothing under them for hundreds of meters. This is the frame that ends up shared everywhere. Fly it at 20–40 meters AGL, level with the cliff face. Light from the east or northeast — morning or midnight sun — hits the underside of the tongue and throws hard, dramatic shadow.
The God’s Eye View (Top-Down at 100–150m)
Position the drone directly over the tongue, gimbal pointed straight down. Somewhere between 100 and 150 meters up, the tongue flattens into a narrow grey slab set against blue. You can see the lake through the gap on either side of the rock, with the plateau filling out the edges of the frame. It’s a composition that really works when someone’s standing at the tip — the gap in scale between that small human shape and the enormous geology around them reads instantly. Shoot around f/2.8 or wherever your equivalent wide-open sits, to pull out the color separation between grey rock, blue water, and green-brown plateau.
The Wide Landscape Pull-Back (250–300m)
This is the shot that hands you the geographic bigger picture, and it’s become a favorite for drone reveal clips. At 250–300 meters over the tongue — past the standard 120m AGL recreational limit, so you’ll need the right certification under EASA’s A2 or A3 categories — Trolltunga shrinks down to a barely-there detail inside a massive fjord landscape. It practically disappears until the viewer knows where to hunt for it, and that search-and-find quality is exactly what makes the footage compelling. It’s one of the best drone spots norway fjords offers for a wide landscape frame that puts a human-scale landmark inside genuinely geological enormity. One caution: up at that altitude, the wind gets noticeably stronger and far less predictable than anything you feel on the ground.
Can You Fly a Drone at Trolltunga? Regulations and Practical Reality
Norway is, in practice, one of the easiest countries in Europe to fly in, and drone flying at Trolltunga cliff was legal under normal conditions on my most recent trip, current rules included. The country runs on EASA’s open category system. Anything under 250 grams — the DJI Mini 4 Pro being the go-to choice among traveling aerial shooters — flies in Open Category A1 with no registration required, as long as you stick to the basics: no flying over crowds, keep it in your line of sight, stay well clear of any emergency response activity. Heavier drones, 250g up to 2kg, need operator registration through the Norwegian Civil Aviation Authority (Luftfartstilsynet) and fall under A1/A2 subcategory rules, which includes the standard 120-meter-above-ground ceiling.
Here’s the part that actually matters on the ground: Trolltunga sits right up against the edge of Hardangervidda National Park. Flying inside a Norwegian national park without specific authorization from the park authority is off-limits, full stop. Check your exact GPS position against the official boundary map before you launch — not after. Trolltunga and the trail leading to it fall outside the park itself, but push out for a wider landscape shot and your drone can easily drift into protected airspace. The Norwegian Environment Agency’s Naturbase tool lets you lay your planned flight path over the protected zones — do that from your hotel or cabin, not once you’re standing on the rock.
There’s also a straightforward crowd problem to deal with. Trolltunga is among Norway’s busiest hikes, and on a peak summer day you’re sharing the trail with thousands of people. Norwegian rules ban flying over gatherings of people outright, and on a July Saturday the trail and the platform at the tip amount to one continuous crowd from start to finish. My advice: fly early, before 8 AM while the trail’s still quiet, or better yet, go for the midnight sun window between 10 PM and 2 AM — the light turns gold, the crowds thin out, and the wind tends to drop too.
The Battery Warmer That Kept My Drone Alive in Norwegian Midnight Sun
Shooting Trolltunga in the midnight sun window puts you flying between 10 PM and 2 AM, right when the light turns perfect — but the air near that 1,180-meter cliff cools off fast, and lithium batteries bleed charge in the cold quicker than you can reset your gimbal. I found this out the hard way on my second attempt at flying the spot.
What works
- Powered off USB-A from a portable pack riding in your backpack, so you’re never dependent on an outlet at the trailhead or back at the cabin.
- Holding the battery at a steady temperature stopped the mid-flight degradation cold — I went from losing 15% charge in cold air down to roughly 3%, which stretched two solid mission cycles out of what used to barely cover one and a half.
- Small enough to disappear into a side pocket of the drone bag, and tougher than it looks on rough trail — mine took a direct sit-on and kept working like nothing happened.
What doesn’t
- Warming a fully cold battery up to usable temperature eats a genuine 20–30 minutes, so a frozen battery straight into the drone isn’t an option — build in the wait or carry spares.
- The pouch runs tight once you’re at two batteries; load in three for a longer shoot and you’ll be swapping them through rather than warming the whole set at once.
I almost scrapped my entire Trolltunga trip when my first attempt yielded videos with stuttering gimbal control and aggressive battery warnings at 40% capacity—until I realized the cold was the culprit, not my drone. shenruifa Drone Battery Constant Temperature Heating Bag USB A UAV Battery Warming Thermal Bag Compatible for NEO for Avata Series
Frequently Asked Questions
What altitude can I fly a drone at Trolltunga Norway?
Fly between 50–300m AGL depending on your shot composition. Standard EASA recreational rules cap you at 120m AGL unless you hold A2 or A3 certification. Wider landscape pulls at 250–300m require the right certification; at that altitude, wind becomes noticeably stronger and far less predictable than ground level.
Do I need a drone permit to fly at Trolltunga?
Drones under 250 grams require no registration and fly in Open Category A1. Drones 250g–2kg need operator registration through Norway’s Luftfartstilsynet and follow A1/A2 subcategory rules. Trolltunga itself is legal, but confirm your exact GPS position is outside Hardangervidda National Park boundaries before launching—the trail lies outside the park, but wider shots can drift into protected airspace.
When is the best time to fly a drone at Trolltunga?
Fly early before 8 AM while the trail is quiet, or during the midnight sun window between 10 PM and 2 AM from June–July, when light turns gold and crowds thin out. Best season overall is late June through mid-August for guaranteed access and midnight sun; late August–September offers autumn color.
How do I keep my drone battery working in Trolltunga’s cold?
Use a powered USB-A battery heating bag to maintain steady temperature during your hike. Cold air causes lithium batteries to lose charge rapidly—a warmer can reduce degradation from 15% down to roughly 3%, stretching two full mission cycles from what barely covered one and a half. Allow 20–30 minutes to warm a fully cold battery before use.
About This Article

Written by Elena Vasquez. Elena Vasquez is a full-time traveler and the founder of Witty Passport. Over fifteen years and more than 50 countries across six continents — including a stretch spent leading groups professionally through Southeast Asia and the remote highlands of South America — she's written the kind of destination guides she always wished existed: practical, specific, and built on real experience rather than recycled itineraries. More about this site.
Scope and limits. Elena is a full-time traveler, not a licensed travel agent or immigration adviser. Entry requirements, visa rules, and advisories change without notice — always confirm against the official government source for your destination and passport before booking.
Verify this against a primary source
Specifics change, and your situation may differ from the one described here. These are the authorities worth checking directly:
- U.S. Department of State — entry requirements and travel advisories
- CDC Travelers' Health — vaccination and health notices by destination
- TSA — current carry-on and screening rules